Introduction
Since the 3.3 version of the PC release, Galimulator supports the creation of your own custom maps, with the following components:
- Star placement
- Background image
- Empire identifiers / names based on spawning location
- Starting empires
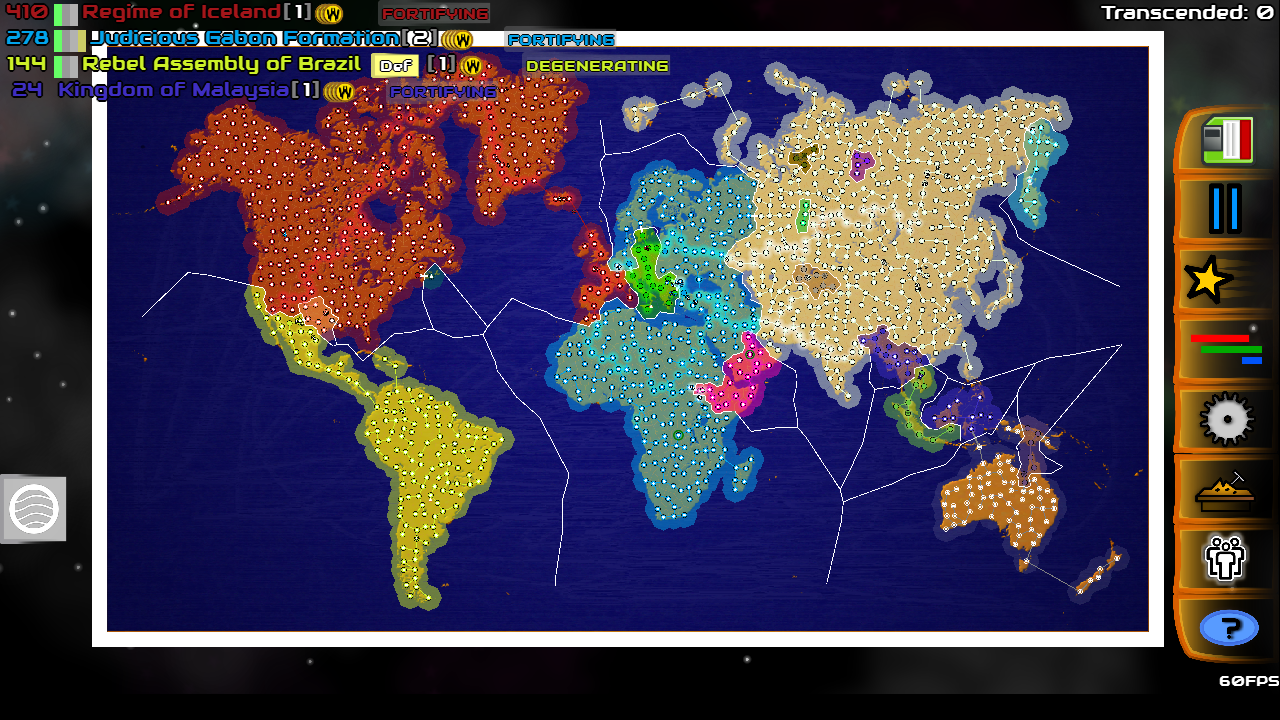
This is exactly the mechanism that I used to create the Earth map:
My hope and dream here is that more people will be interested in making such maps for the game, and that I will be able to ship those maps as part of the game, and perhaps even set up a community to share such maps between users. This article will explain how to do this.
Getting started
The heart of the custom map file is the .map file, which you will need to put in the assets/data/maps/ folder. Here's a look at the Earth.map file:
name=Earth
bits-file=earth.bits
background-image=decoratedearth.png
locations=earthcountries.merc
This file in itself is quite easy to understand. It's just a simple way of pointing the game to files where the real interesting stuff is stored.
If you want to try your hand at making your own map, simply create a new .map file in this directory. For the purposes of this article, let's create a new empty file called Happy.map.
If you make any mistakes in this file, chances are that you'll crash the game, or maybe get a helpful printout on the terminal with a graceful exit if you're lucky. So let's dive down into the details.
Name
So first of all, let's decide a name for the map, let's go with Happy!, so add this line to the file:
name=Happy!
Well, that's a start at least! It gets a bit more complicated though.
Bits file
Now, the bits file is simply the file Galimulator uses to determine where it may place stars, and where it may not. Internally it's stored as a bunch of 1:s or 0:s, hence the cryptic name. But never mind.
All you need to worry about is making an image file, where black means "put stars here", and any other color (including white) means "leave this space empty". Then you will also need to use a small utility program I made called MapBitter. This converts a .bmp file into a .bits file. Download it here:
http://www.galimulator.com/MapBitter.zip
Run it either from the command line, simply passing it the name of the bitmap file, e.g:
MapBitter.exe happy.bmp
Or you can probably also just drag the file to the icon in windows explorer, though I didn't try that myself since I don't have windows ... The terminal is recommended since you can see the output of the program. You should see something like this:
I will do my best to process: happy.bmp for youLand pixels: 214385Sea pixels: 707215Map successfully save to: happy.bits
If you see 0 pixels, make sure that your land is actually completely black, that is rgb(0,0,0).
The end result should be a .bits file which you will add to your map file, like so:
bits-file=happy.bits
Background image
So now to put an elegant background to the map, simply first create it :) Saving it as a png is your best bet, though other formats will probably work as well:
background-image=happy.png
Locations
The final thing to worry about for now is locations on the map. A locations file is simply a list of coordinates along with a name associated with them. New empires that spawn near those locations are likely to get names using those identifiers. For instance, The Smashing Empire of Sweden, etc.
They look something like this:
-0.03048042774250187,0.09658384968022296,Andorra
0.25397145102994345,-0.024777819241087025,Arab
0.3294430864099612,0.03862237860884213,Afghanistan
It's simply a file with lines that contain the following comma separated data:
x coordinate, y coordinate, name
The coordinates are normalized between -1 and 1 to each respective dimension (0,0 is the center, 1,1 is the upper right).
In the Earth map, these are generated by running a conversion script on some real life data, and then trying to map them to a Mercator projection. This was very hard to tune right, the result was far from perfect. There's a simpler, though perhaps more time consuming option available.
First: Press 'd' to enable debug mode.
This will show you as yellow circles all the locations you have in your file (as of 3.4, at least).
If you click anywhere on the map, the terminal will display the coordinates of the place you just clicked, and which location is nearest. You could use this to simply click on the map for all the locations you want to add, copy paste the terminal output into a file and add your name.